

How to use Logistic Regression Machine Learning model with 2UDA – PostgreSQL and Orange (Part 5)
This article gives a step by step guide to utilizing Machine Learning capabilities with 2UDA. In this article, we will use examples of Animals to predict whether they are Mammals, Birds, Fish or Insects.
Software versions
We are going to use 2UDA version 11.6-1 to implement the Machine Learning model. This version 11.6-1 combines:
- PostgreSQL 11.6
- Orange 3.23.0
You can find the latest version of 2UDA here.
Step 1:
Load training dataset into PostgreSQL
The sample dataset that is used to train our model is available at the official Orange GitHub repository here.
Follow these steps to load the training data into PostgreSQL tables:
1. Connect to PostgreSQL via psql, OmniDB or any other tool that you are familiar with.
2. Create a table to store training data. Here it is named as training_data.
CREATE TABLE training_data(name VARCHAR (100), hair integer, feathers integer, eggs integer, milk integer, airborne integer, aquatic integer, predator integer, toothed integer, backbone integer, breathes integer, venomous integer, fins integer, legs integer, tail integer, domestic integer, catsize integer, type VARCHAR (100));
3. Insert training data into the table via COPY query. Before executing this query make sure that PostgreSQL has required read permissions on the data file otherwise COPY operation will fail.
NOTE: Please make sure you type a tab space between single quotes after the delimiter keyword. Rows two and three of the training dataset in the .tab file contain some meta information. Since it is not needed at this point, it has been removed from the file.
COPY training_data FROM 'Path_to_training_data_file’ with delimiter ' ' csv header;
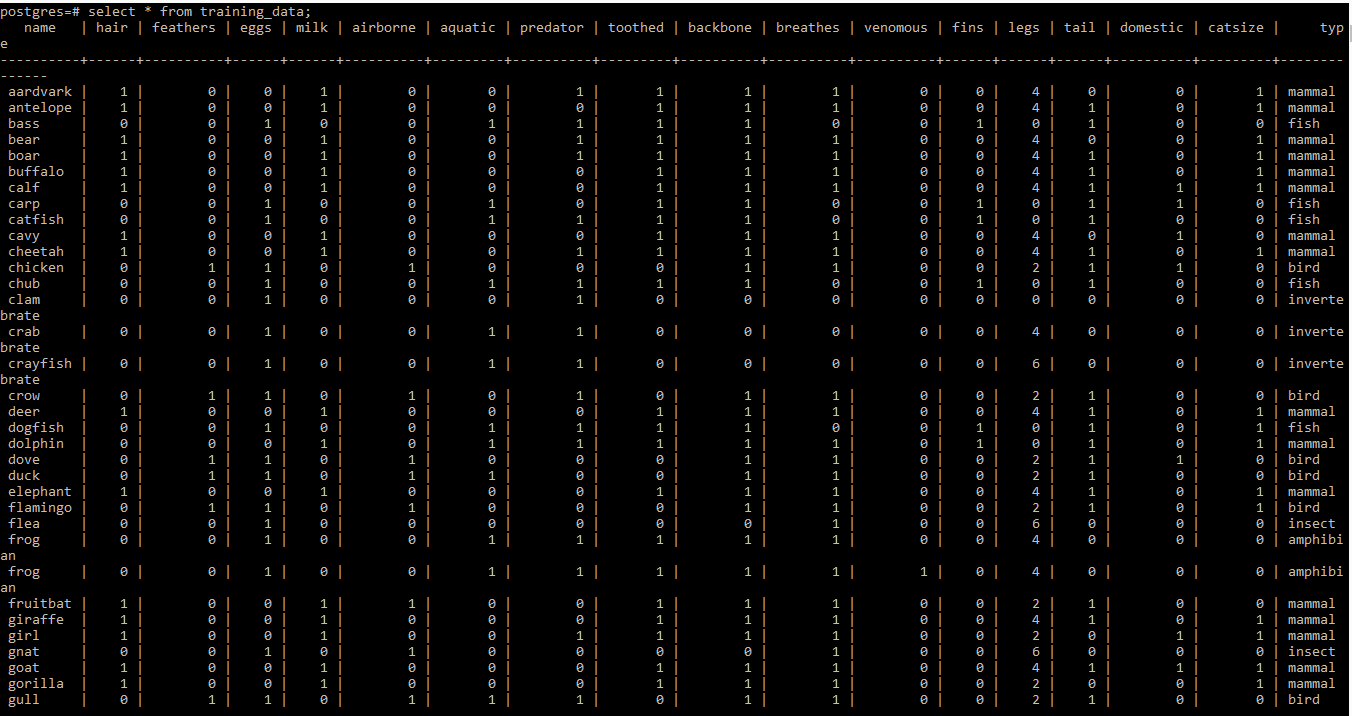
Please find the screenshot of training dataset below
Step 2:
Create a workflow with Orange
- Go to the desktop and double click on the Orange icon.
- Create a blank project by clicking on New from the menu.

![]()
Now you are ready to apply the Machine Learning model on the dataset.
Step 3:
Select Machine Learning model to train the data
For this article, the Logistic Regression model is used to train the data. Once the data training process is complete, in the next step, test data is passed to the Prediction widget to check the accuracy of predictions.
Step 4:
Import training data from PostgreSQL into Orange
This training dataset will be used to train the Machine Learning model.
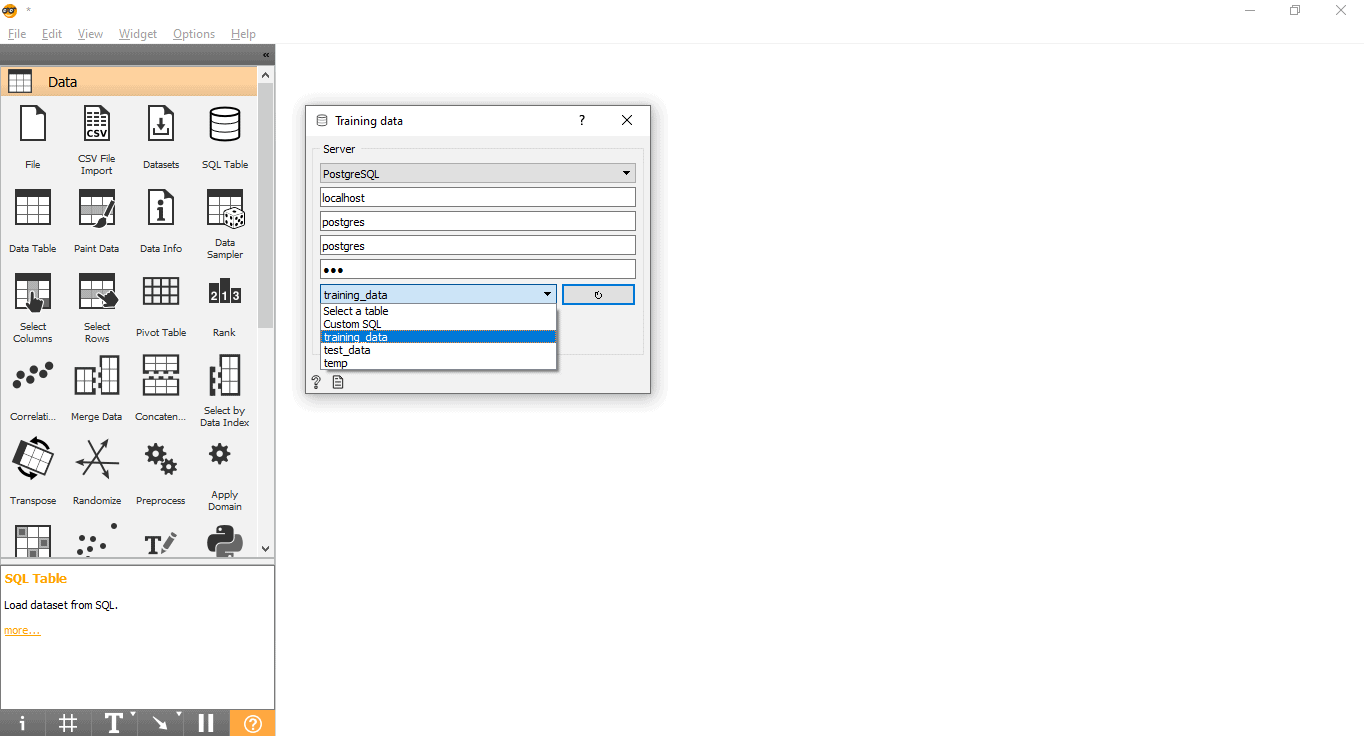
- Drag and Drop SQL Table widget from the Data menu.
- Rename widget (Optional)
-
- Right-click on the SQL Table widget.
- Select Rename.

- Connect with PostgreSQL to load the training dataset:
-
- Double click on the Training data widget.
- Enter credentials to connect to the PostgreSQL database.
- Press the reload button to load all the available tables from the given database.
- Select the training_data table from Drop down menu and close the pop-up.
Step 5:
Add Target column
This step is important because the Machine Learning model will try to predict the data for this target variable/column:
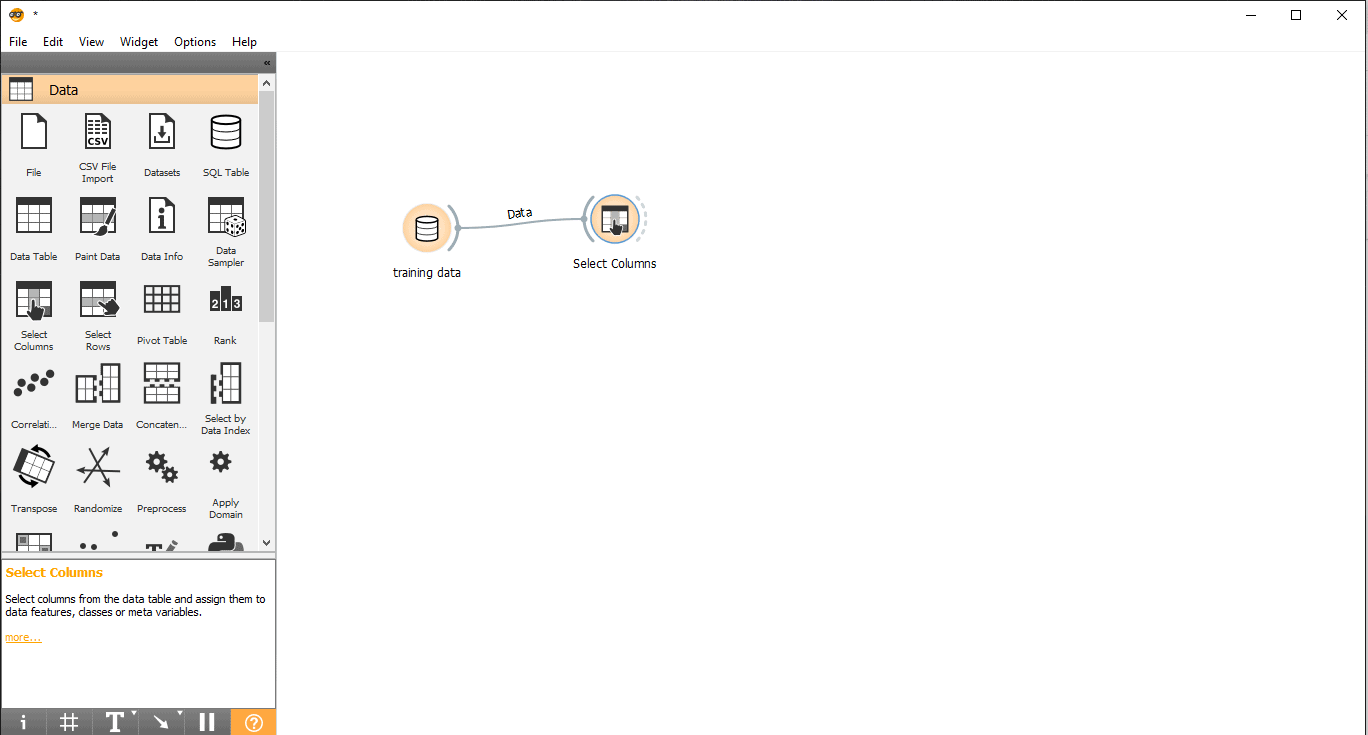
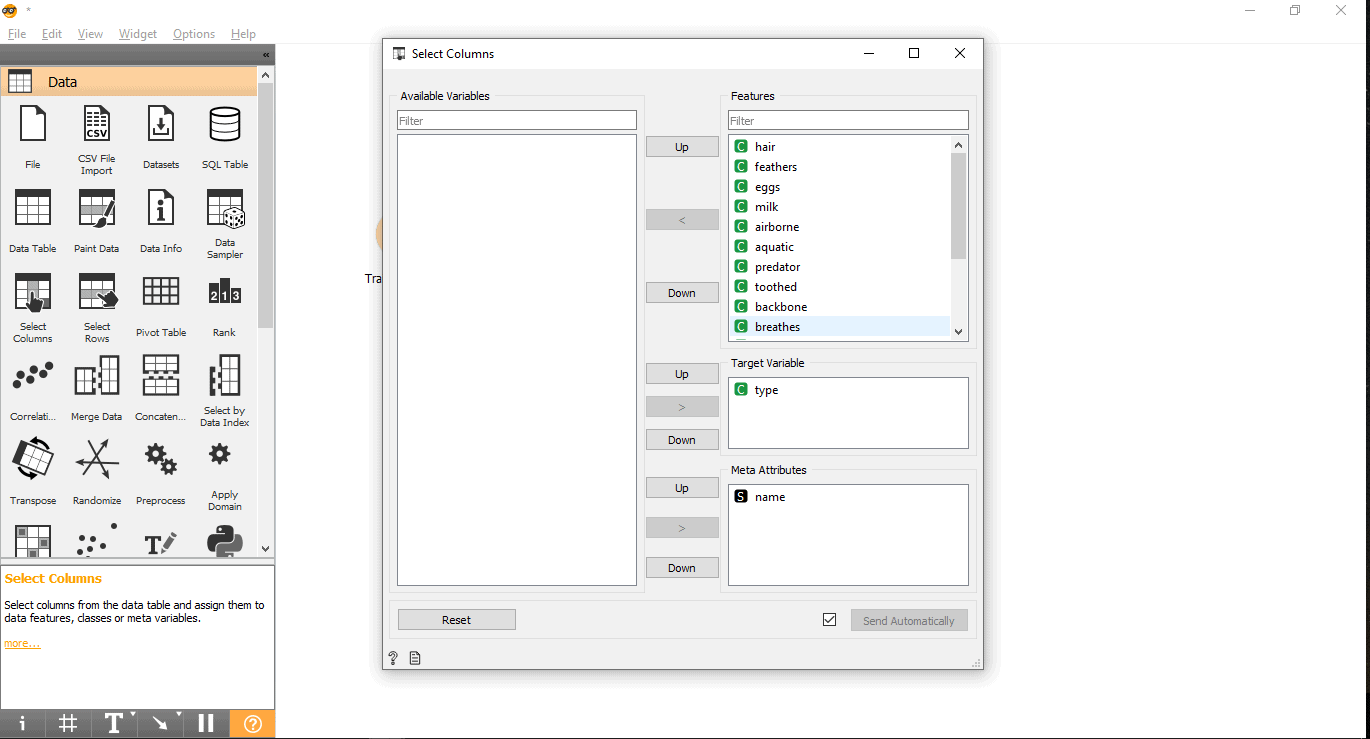
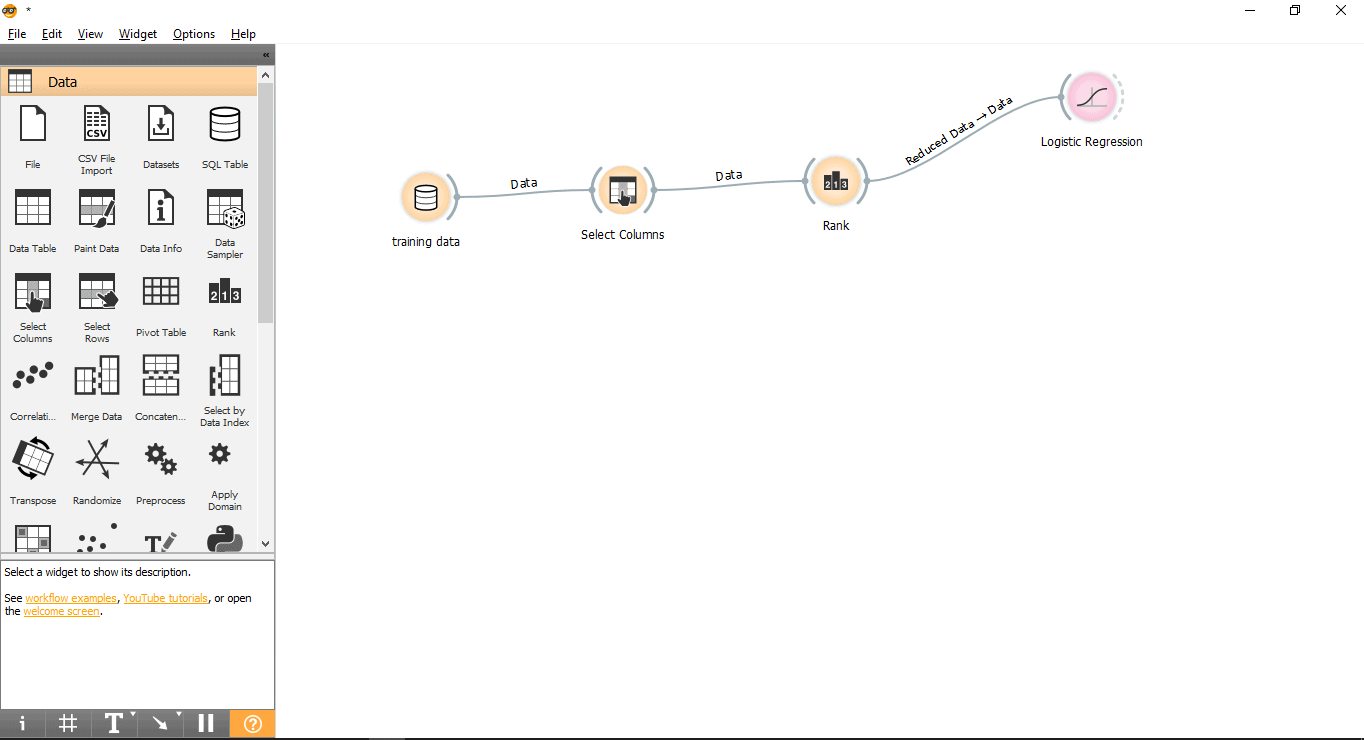
- Drag and drop Select Columns widget from the data menu.
- Draw a link line from the training data widget to Select columns widget.
- Double click on the Select Columns widget.
- Search your target column under the Features label. Here, the type is used as a target variable because we need to see what type a given animal is.
- Drag and drop it under the Target Variable box and close the pop-up.
Step 6:
Columns ranking
You can Rank or Score the training variable/columns according to their correlation with the target column.
- Drag and drop the Rank widget from the data menu.
- Draw a link line from Select columns widget to Rank widget.
- Double click on the Rank widget to see the most related columns in the training data table. It will select the top 5 columns by default.
![]()
![]()
Step 7:
Data training
In this step, the Logistic Regression model will be trained with the training dataset. Follow the following steps:
- Drag and drop the Logistic Regression widget from the Model menu.
- Draw a link line from Rank widget to Logistic Regression widget.
Step 8:
Load test dataset into PostgreSQL
A separate test dataset is created to perform predictions. Follow the following steps to load the test dataset into the PostgreSQL table.
1. Create a table to store our test data. Here it is named as test_data.
CREATE TABLE test_data(name VARCHAR (100), hair integer, feathers integer, eggs integer, milk integer, airborne integer, aquatic integer, predator integer, toothed integer, backbone integer, breathes integer, venomous integer, fins integer, legs integer, tail integer, domestic integer, catsize integer, type VARCHAR (100));
2. Insert test data into the test table via COPY query. Before executing this query please make sure that PostgreSQL has required read permissions on the data file otherwise COPY operation will fail.
NOTE: Please make sure you type a tab space between single quotes after the delimiter keyword. A question mark is intentionally placed in the type column of the test dataset because we need to figure out the type of a given animal with our Machine Learning model.
COPY test_data FROM 'Path_to_test_data_file’ with delimiter ' ' csv header;
Please find the screenshot of test dataset below

Step 9:
Import the test data from PostgreSQL into Orange
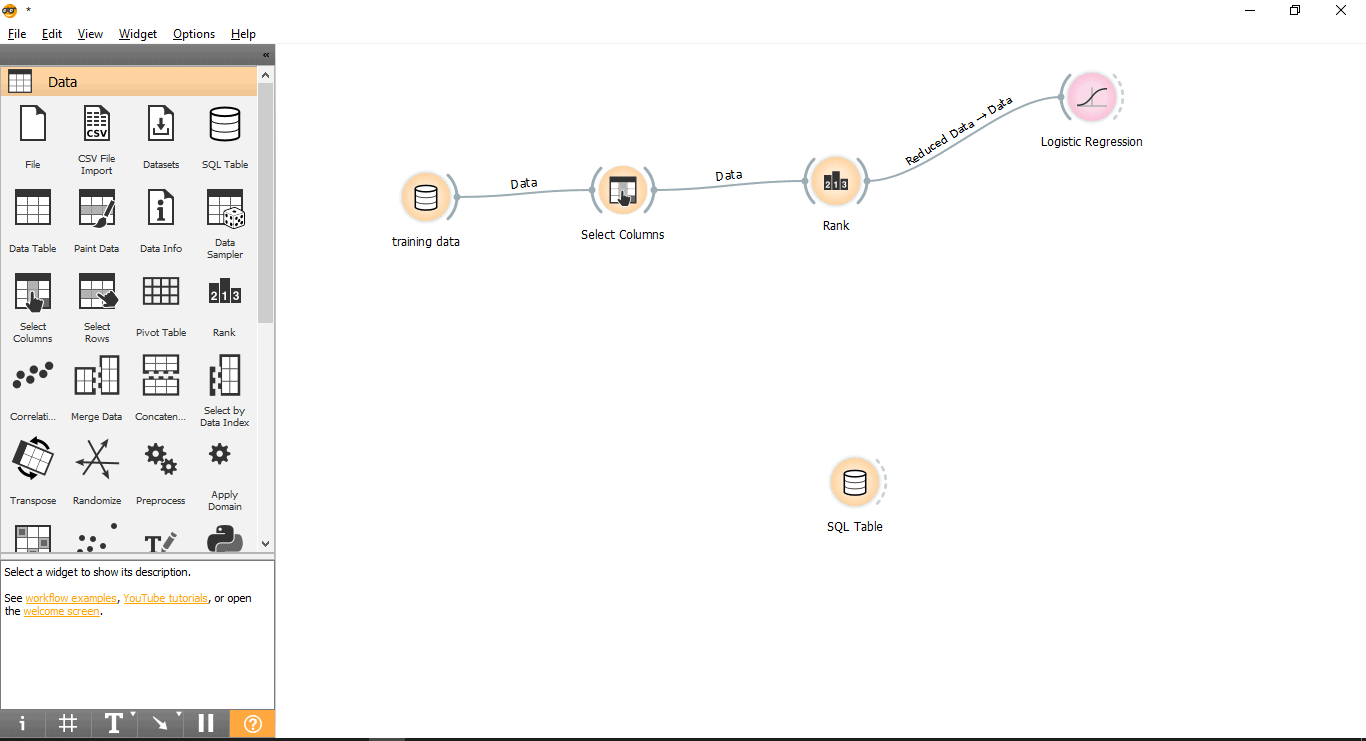
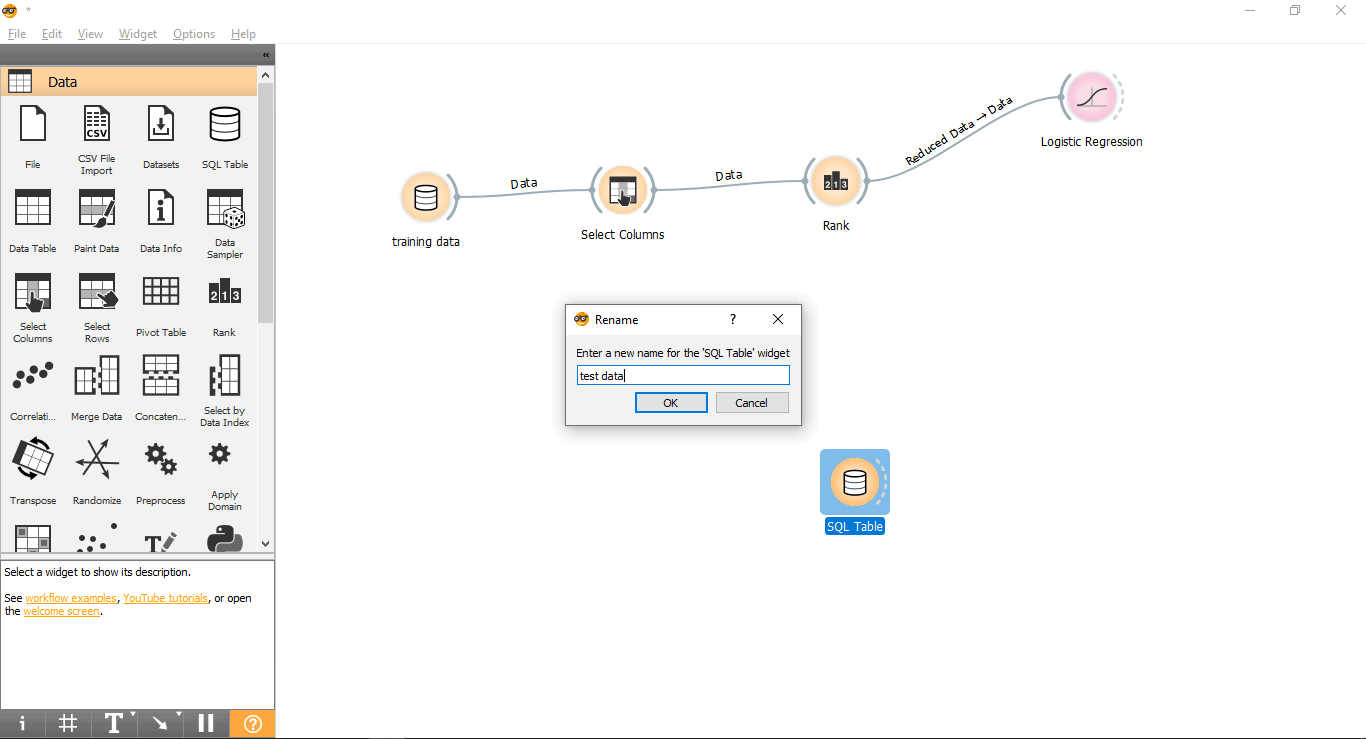
- Drag and drop SQL Table widget from the data menu.
- Rename widget (Optional)
-
- Right-click on the SQL Table widget.
- Select Rename.
- Connect with PostgreSQL to load test data.
-
- Double click on Test data widget.
- Connect it with the Test_data table from PostgreSQL.
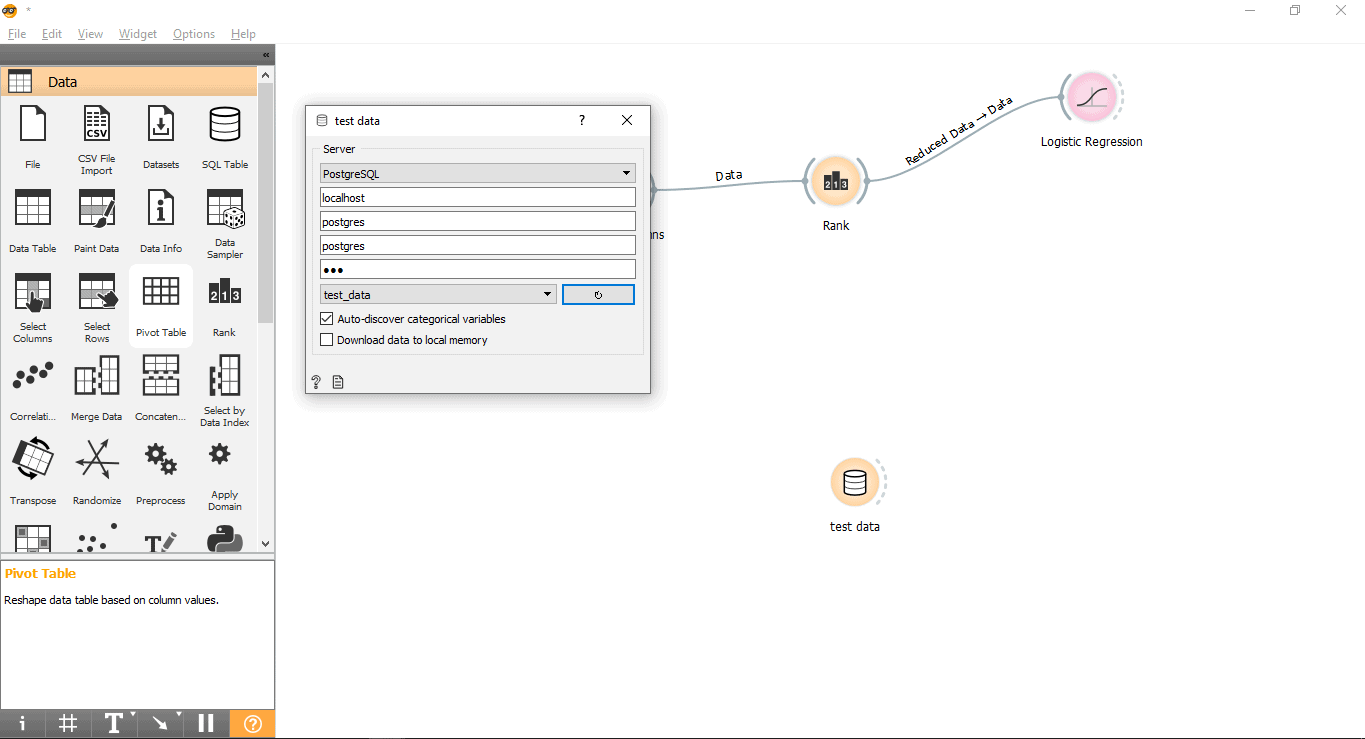
Now we are ready to perform predictions.
Step 10:
Predictions
The Prediction widget will try to predict the test data based on training data from the Logistic Regression model.
- Drag and drop the Prediction widget from the Evaluate menu.
- Draw a link line form Test data widget to Prediction widget.
- Draw a link line from the Logistic Regression widget to the Prediction widget.

Step 11:
Results
Double click on Prediction widget to view the results.
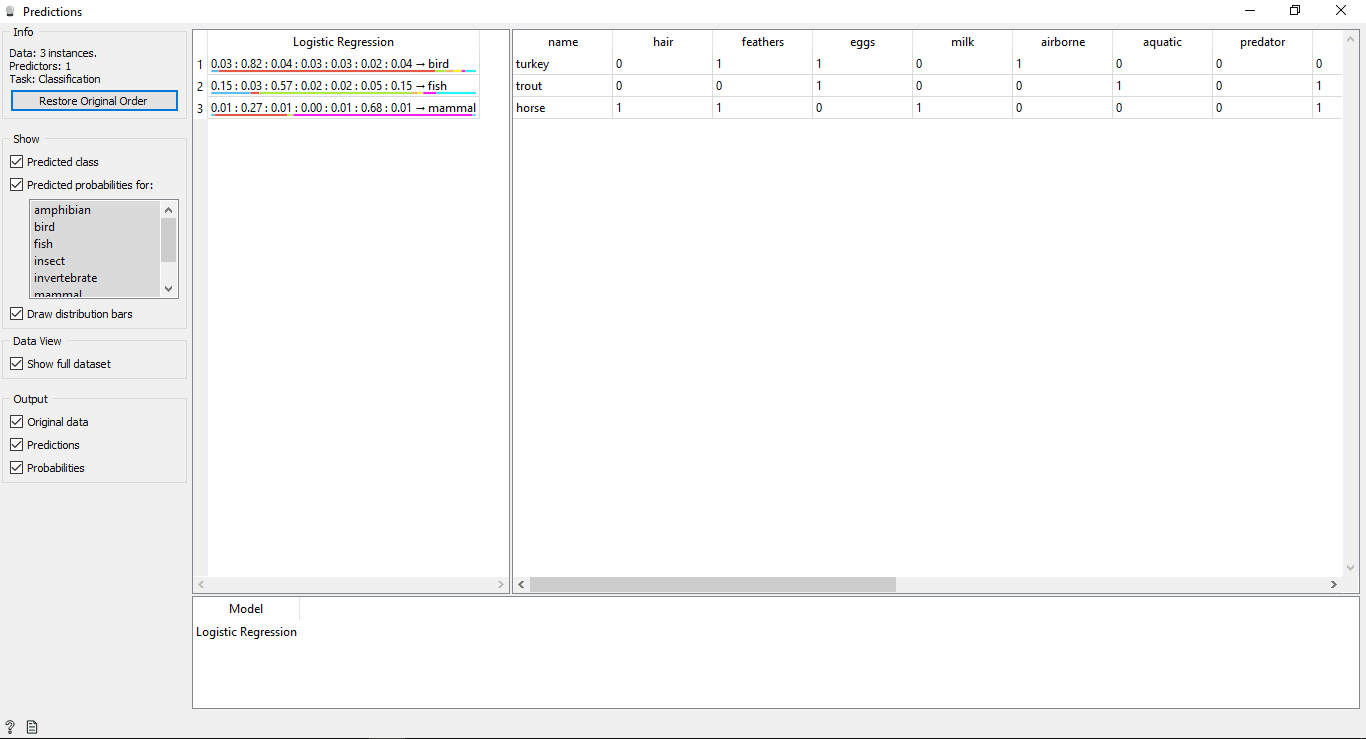
Understanding the Results
You will see 2 main tables in the prediction window. The table on the left side shows the predicted results, while the table on the right shows the original test data, which was provided for predictions.
Since the Logistic Regression model was used to train data so you will see one column named Logistic Regression that lists the results.
As we know:
- Horse is a Mammal
- Trout is a Fish
- Turkey is a Bird
So the Logistic Regression model is able to determine all the types correctly.
Predictions Accuracy
If you see the table on the left side in the prediction widget’s output, it has some numbers before the predicted type i.e, 0.02, 0.05, 0.04. These numbers show the accuracy of the predicted type.
We have used 7 types of animals in the training dataset, so it shows a total number of 7 columns with accuracy values each column will represent 1 type of animal. You can check which column is representing what type of animal by looking at the list available on the left side of your screen under Predicted probabilities for.
1st row says Turkey is a bird. We can see its accuracy is 0.82(from the 2nd column) which is the highest of all in that row.
2nd row says Trout is a Fish and its accuracy is 0.57 (from 3rd column) which is the highest of all in that row.
3rd row says Horse is a Mammal and its accuracy is 0.68 (from the 6th column) which is the highest of all in that row.
In this article, we have used the Logistic Regression model to implement the Machine Learning model. In the next blog, we will be using the AdaBoost model.
For any questions or comments, please get in touch using the contact form here.
Previous blog post:
How to use the KNN Machine Learning Model with 2UDA – PostgreSQL and Orange (Part 1)
How to use the SVM Machine Learning Model with 2UDA – PostgreSQL and Orange (Part 2)
How to use the Random Forest Machine Learning Model with 2UDA – PostgreSQL and Orange (Part 3)
How to use Tree Machine Learning model with 2UDA – PostgreSQL and Orange (Part 4)
![Collations: Introduction, Features, Problems [Follow Up]](https://www.2ndquadrant.com/wp-content/uploads/2020/05/514337-weekly-webinars-2april-13may-INDIVIDUAL-social-80x80.png)

Leave a Reply
Want to join the discussion?Feel free to contribute!