
pglogical with OmniDB
1. Introduction
pglogical is an extension that provides an advanced logical replication system that serves as a highly efficient method of replicating data as an alternative to physical replication.
Here we will show how to build a test environment to play with PostgreSQL and pglogical, and how to configure it using the OmniDB 2.2 web interface.
2. Building test environment
Let’s build a 2-node test environment to illustrate how to configure PostgreSQL and pglogical within OmniDB.
2.1. Pull OmniDB repo
The first thing you need to do is to download OmniDB repo from GitHub and make sure you are in the development branch. Run the following:
git clone http://github.com/OmniDB/OmniDB
cd OmniDB
git checkout dev
2.2. Create 2 virtual machines with PostgreSQL and pglogical
On your host machine, you need to have installed:
- VirtualBox
- Vagrant
- Vagrant plugin vbguest
Please refer to VirtualBox and Vagrant websites for more information.
For this test environment to work, you need to put both machines in the same internal network. If necessary, please edit the file Vagrantfile for both machines now, like this:
cd OmniDB/OmniDB_app/tests/vagrant/multinode/pglogical_node1
vagrant up
vagrant ssh. User vagrant has root access with sudo su. Now let’s create the second virtual machine with PostgreSQL and pglogical:cd ../pglogical_node2
vagrant up
omnidb.3. Configuring pglogical
3.1. Use OmniDB to connect to both machines
Assuming you have OmniDB (server or app) installed in your host machine, you can connect to both databases in order to test the connection. In OmniDB, create 2 connections like this:

Then click on the Test Connection action on each connection. You will have to type the password of the user omnidb, which is also omnidb.
3.2. Create pglogical extension in both nodes
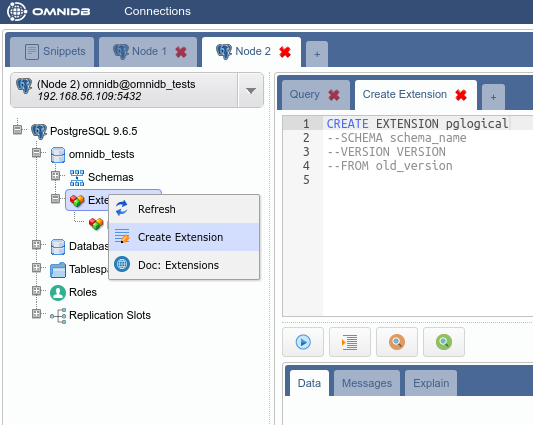
pglogical requires an extension to be installed in both nodes. Inside OmniDB, you can create the extension by right clicking on the Extensions node, and choosing the action Create Extension. OmniDB will open a SQL template tab with the CREATE EXTENSION command ready for you to make some adjustments and run:
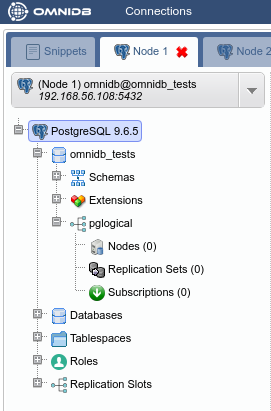
After you have created the extension, you need to refresh the root node of the treeview, by right-clicking on it and choosing Refresh. Then you will see that OmniDB already acknowledges the existence of pglogical in this database. However, pglogical is not active yet.
3.3. Create pglogical nodes
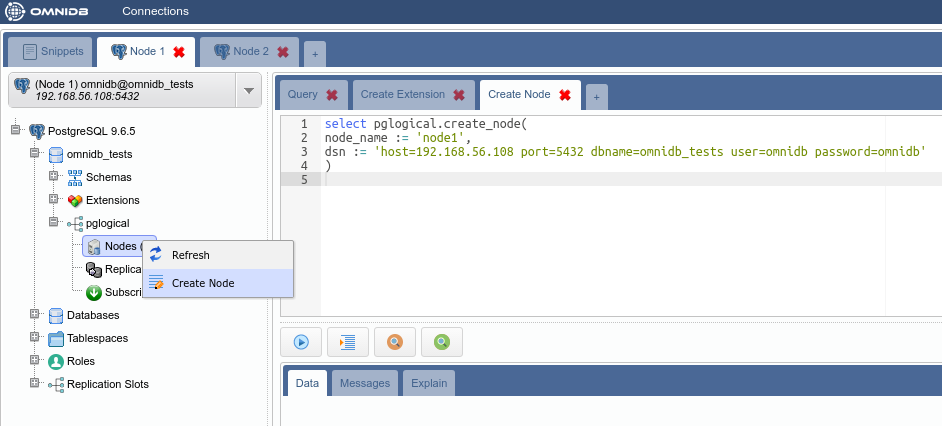
To activate pglogical in this database, we need to create a pglogical node on each machine. Inside the pglogical node of the treeview, right click Nodes, then choose Create Node. In the SQL template that will open, adjust the node name and the DSN and run the command.
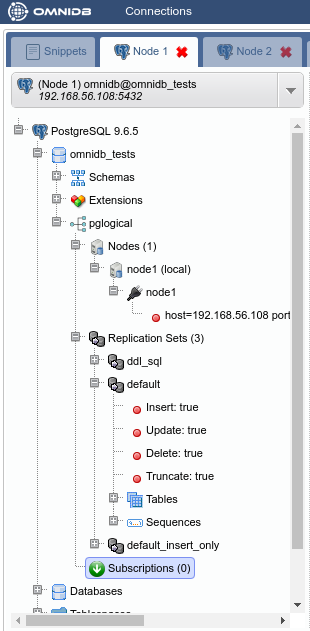
Then right click Nodes again, but this time choose Refresh. You will see the node you just created. Note how OmniDB understands that this node is local. Expand the local node to see its interface inside. You can manage the interfaces of the nodes using OmniDB too.
Go ahead and expand the Replication Sets node. You can see pglogical default replication sets are already created: ddl_sql, default and default_insert_only. You can also manage replication sets using OmniDB.
Now create a node on the other machine too. Choose a different name for the node.
3.4. Create a table on the first machine
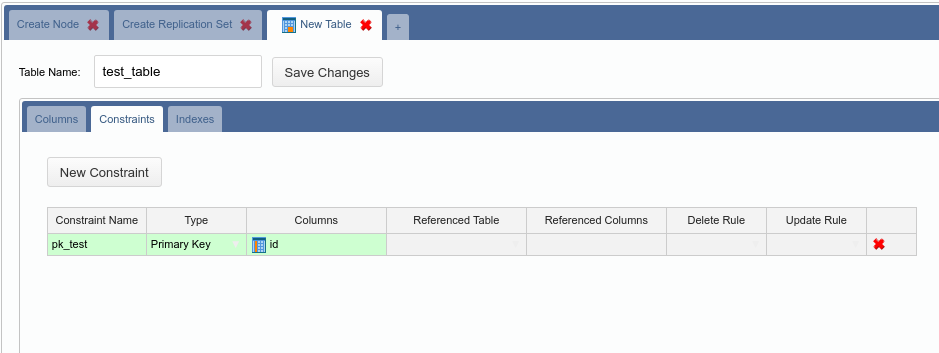
In the first machine, under the Schemas node, expand the public node, then right-click the Tables node and choose Create Table. In the form tab that will open, give the new table a name and some columns. Also add a primary key in the Constraints tab. When done, click in the Save Changes button.

3.5. Add the new table to a replication set on the first machine
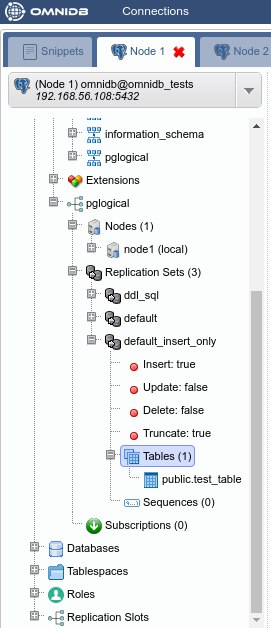
In the first machine, under the default_insert_only replication set, right click the Tables node and choose Add Table. In the SQL template tab that will open, change the table name in the relation argument and then execute the command.

Refresh the Tables node to check the table was added to the replication set.
3.6. Add a subscription on the second machine
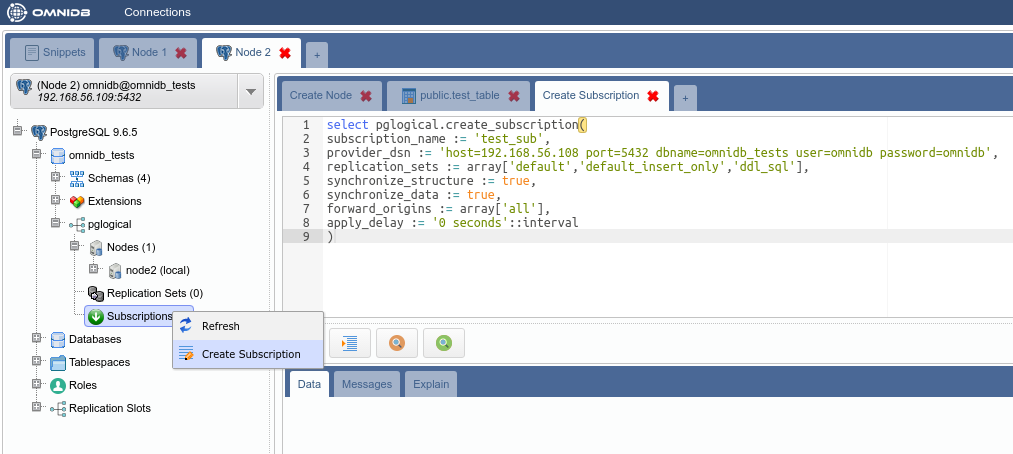
In the second machine, right-click the Subscriptions node and choose Create Subscription. In the SQL template tab that will open, change DSN of the first machine and then execute the command.
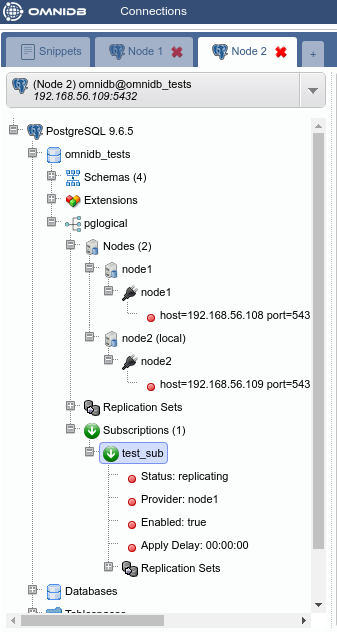
Refresh and expand both Nodes and Subscriptions nodes of the treeview. Note how now the second machine knows about the first machine. Also check the information OmniDB shows about the subscription we just created.
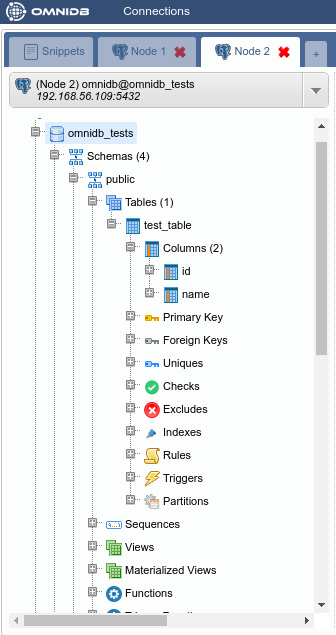
Also verify that the table public.test_table was created automatically in the second machine:
3.7. Add some data in the table on the first machine
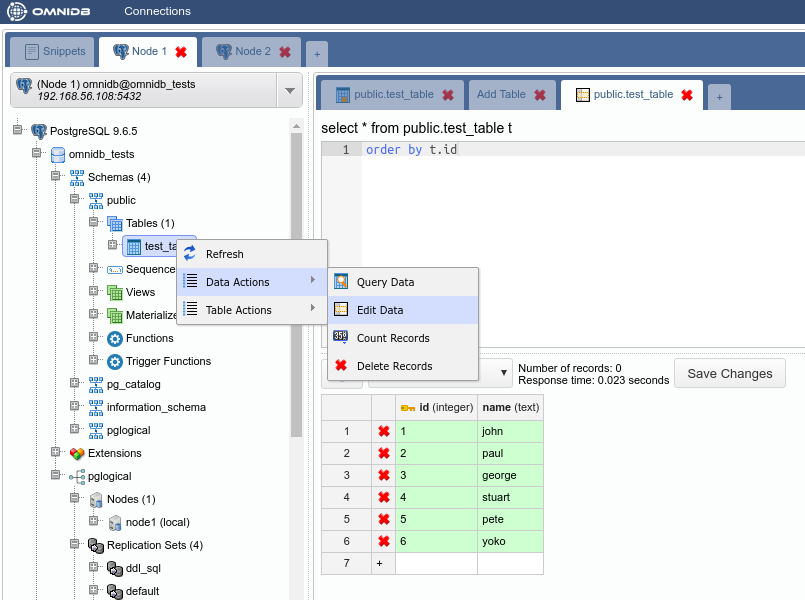
In the first machine, under the Schemas node, expand the public node and the Tables node. Right-click in our table, test_table, move the mouse pointer to Data Actions and then click on Edit Data. Insert some data to the table. When finished, click on the Save Changes button.
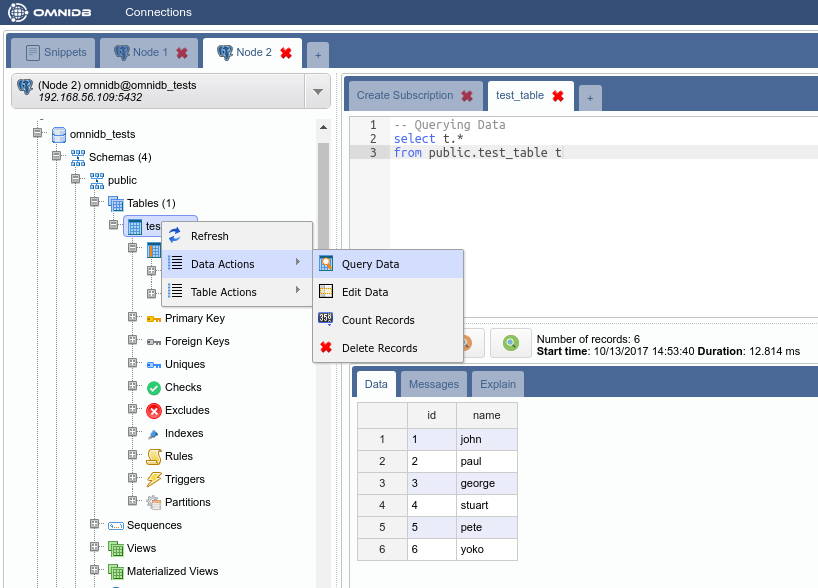
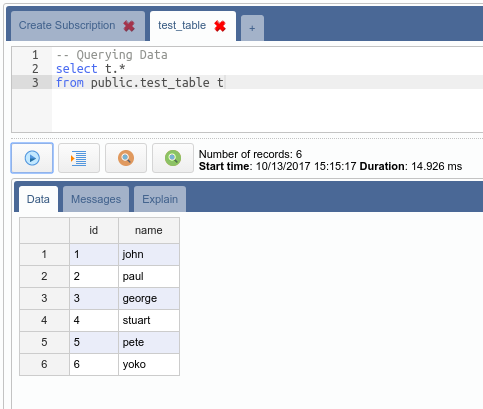
Now let us check the data was replicated. Go to the second machine and right-click the table, move the mouse pointer to Data Actions and then click on Query Data.
3.8. Check if delete is being replicated
In the Edit Data tab in the first machine, remove Pete and Stuart. Click on the button Save Changes when done.
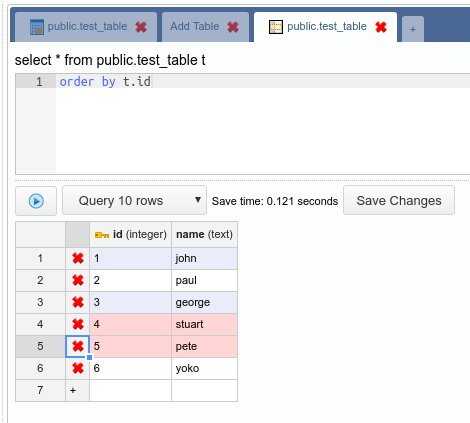
Check if these 2 rows were deleted in the second machine.
They were not removed in the second machine because the table public.test_table is in the replication set default_insert_only, that does not replicate updates and deletes.
Thanks for your post, it helps me a lot. I’ve a problem, when I use the default_insert_only, my replication works fine, but when I try to create my table on default, I get an error ”replication set “default” not found”. I inserted a table on the default replication set with right-click on default_insert_only and then I deleted the part ”insert_only” and just leave the word ”default”, with this action I got my table on the default replication set, but if I try to delete it I get the error message again. How can I solve this problem??
My solution was to do the same I did for inserting the table, but removing in this case. I mean, right-click on the table created on the default_insert_only and then I deleted the part ”insert_only” and just leave the word ”default”. This works for me, but I think this is not the right way.